SIP Trunking Setup: Connect Pulsy AI to Twilio (Step-by-Step Guide)
One of the questions we get asked most often at PulsyAI is how to connect Pulsy to an existing telephony system or VoIP provider — in other words, how to do SIP trunking with PulsyAI. This walkthrough shows the full setup using Twilio as the carrier: termination, authentication, origination, and number routing, end to end.
1. Create the Elastic SIP Trunk
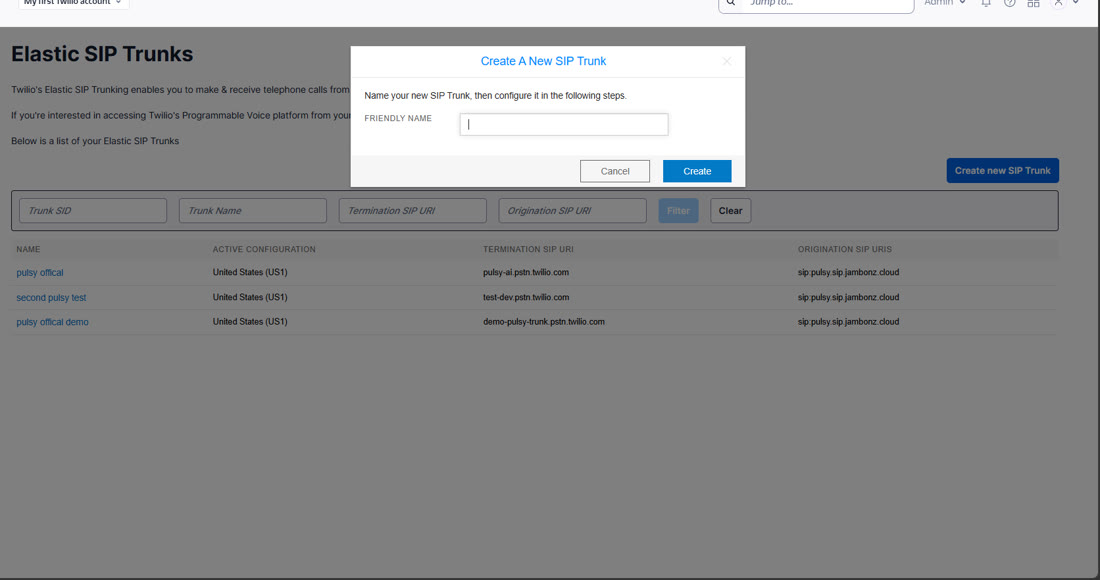
In the Twilio console, open the Elastic SIP Trunking dashboard and click Create new SIP Trunk. Give it a friendly name and click Create. This opens the trunk's configuration dashboard, where the next three steps happen.
2. Create the termination SIP URI
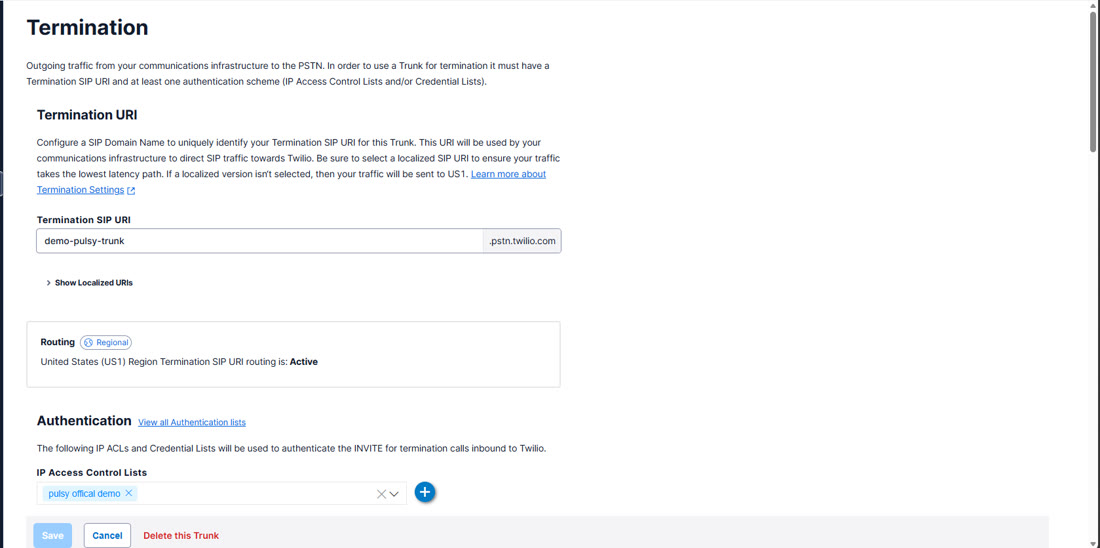
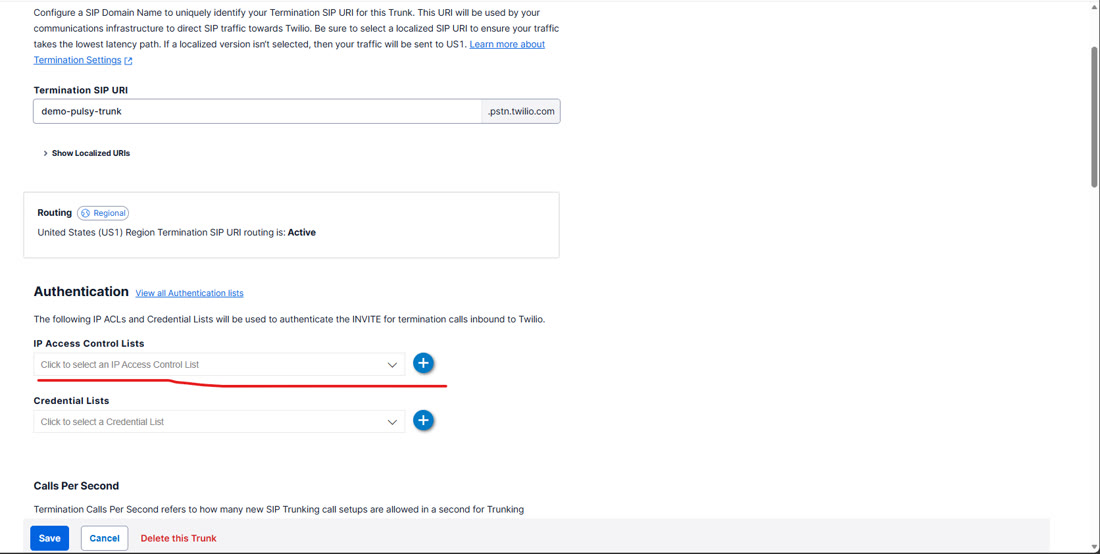
The termination URI is what Pulsy calls to send a call out to the phone network: Pulsy calls this URI, which goes to Twilio, which goes out to the PSTN. Choose a unique name; Twilio appends .pstn.twilio.com automatically. Under Authentication, this trunk is secured with an IP Access Control List (covered in the next step).
3. Whitelist Pulsy with an IP Access Control List
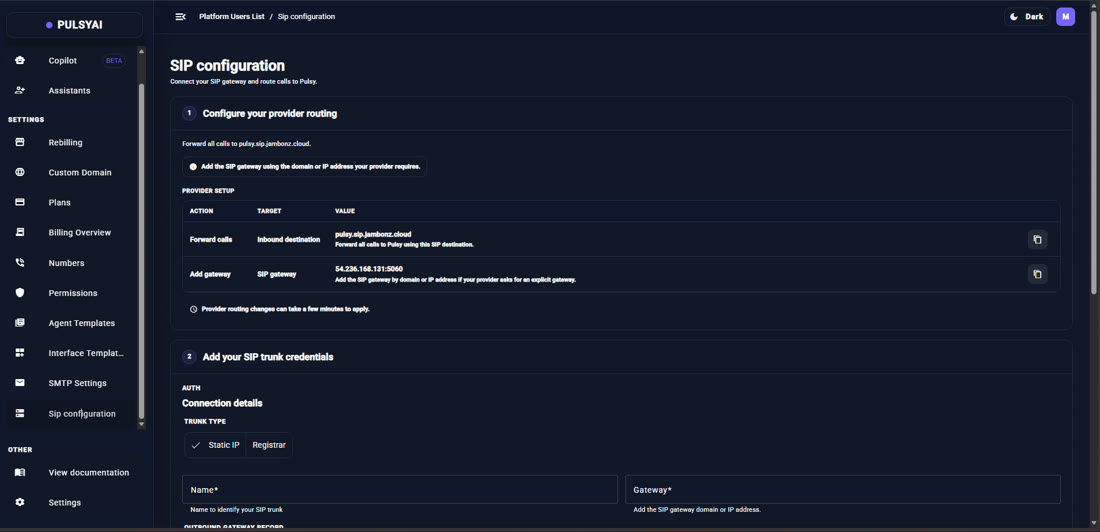
Authentication is handled with an IP Access Control List. In the Pulsy dashboard, open SIP Configuration to find the SIP gateway address to whitelist (shown under Configure your provider routing — Add gateway). Back in Twilio's Termination tab, click the IP Access Control Lists dropdown and create a new list with that address.
4. Point origination at Pulsy
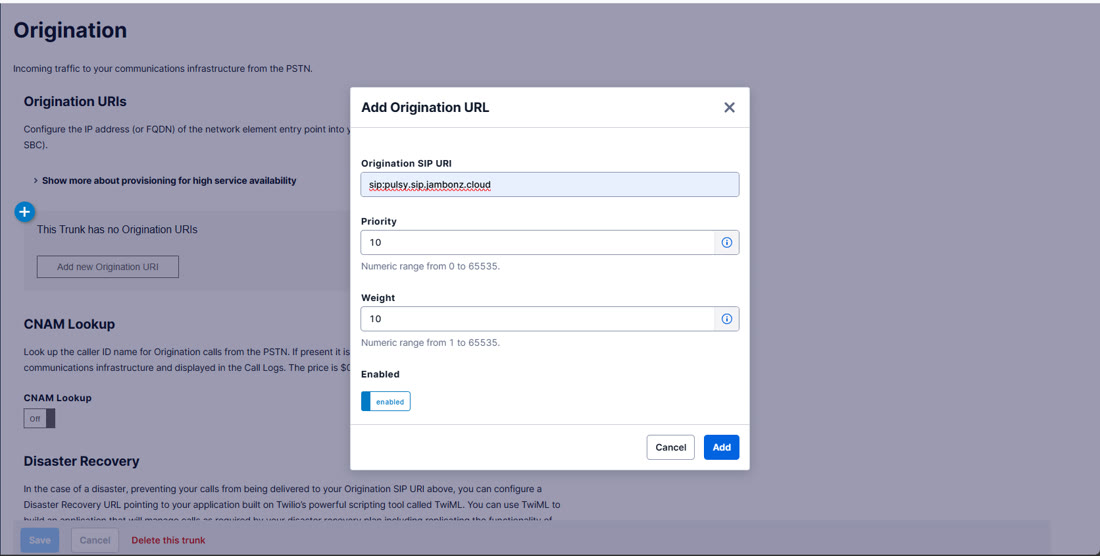
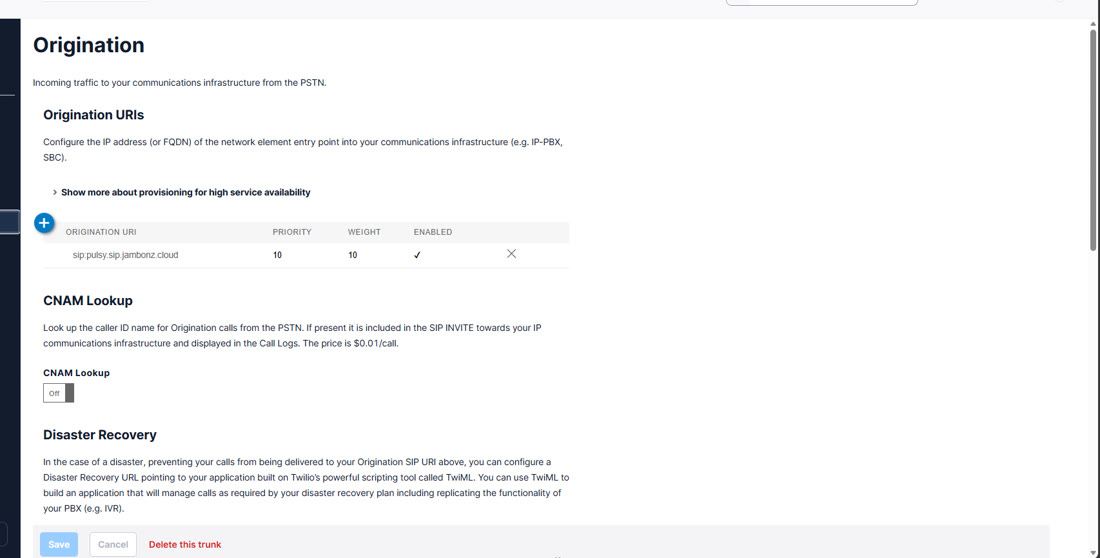
The origination URI tells Twilio where to forward incoming calls: from the PSTN, through Twilio, to this URI, into Pulsy. Copy Pulsy's SIP destination (for example sip:pulsy.sip.jambonz.cloud) from the SIP Configuration page and add it under the Origination tab. It must always be prefixed with sip:.
5. Attach a phone number
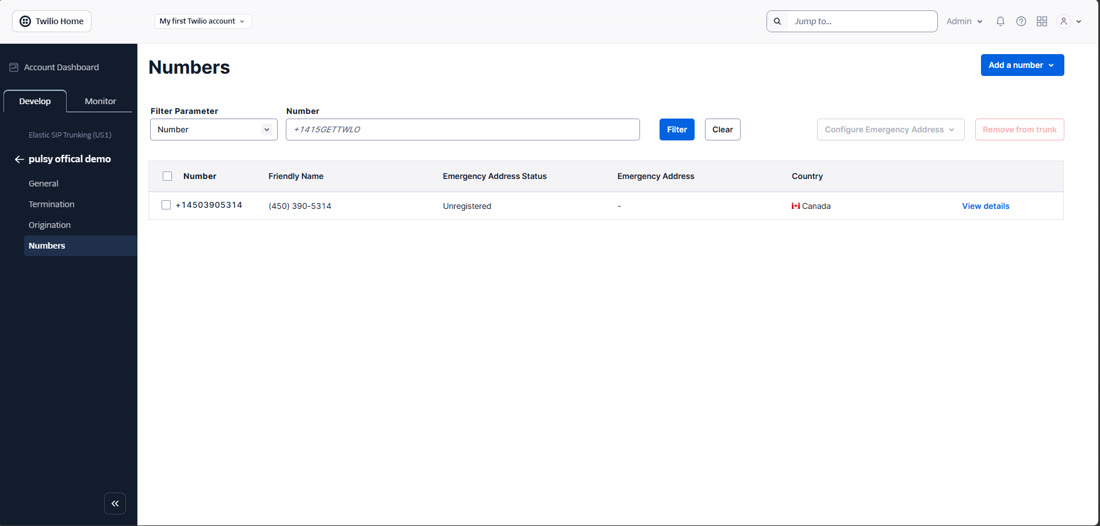
Under the Numbers tab, either buy a new number or add an existing one you already own. Once attached, that number is usable through this SIP trunk.
6. Create a static trunk in Pulsy
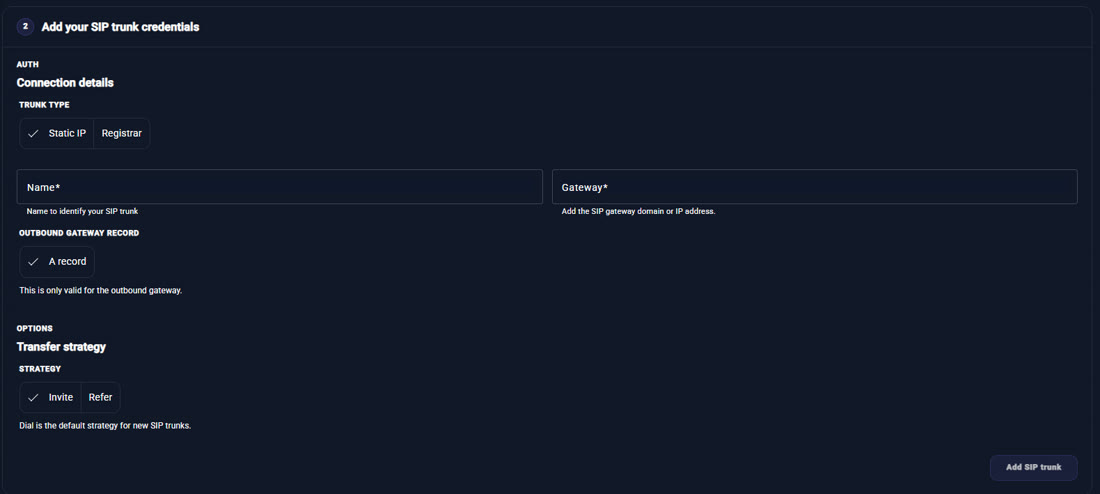
Back in Pulsy's SIP Configuration page, under Add your SIP trunk credentials, choose Static IP as the trunk type, name it, and paste in Twilio's termination URI as the Gateway. Set the Outbound Gateway Record to A record and the Transfer strategy to Invite, then click Add SIP trunk.
7. Import the number and finish
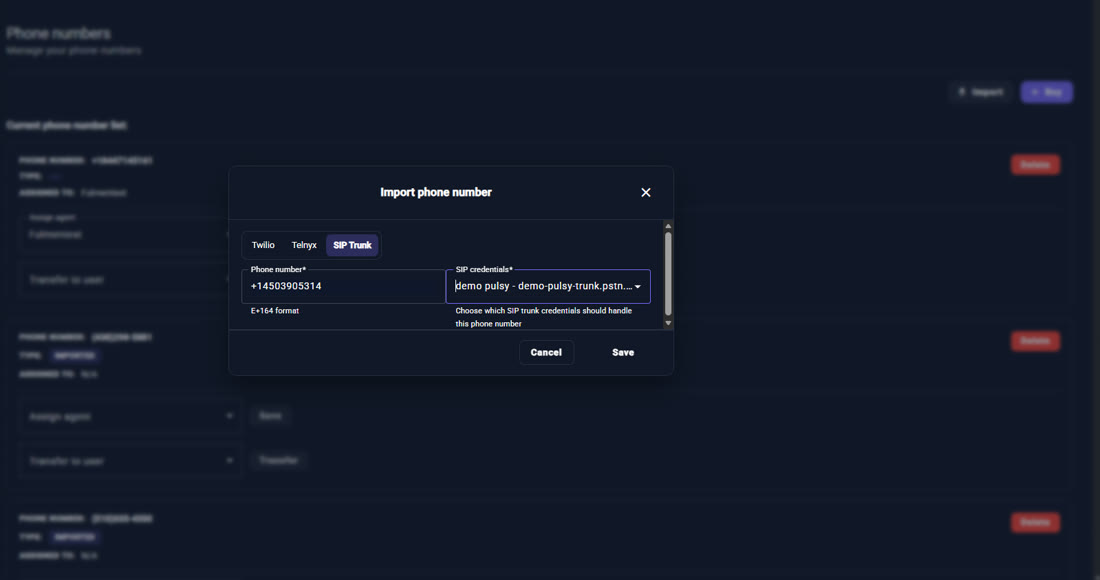
In Pulsy's Numbers tab, choose Import, then the SIP Trunk tab, enter the number from step 5, and select the SIP trunk credentials you just created. Save. The number is now fully routed through SIP trunking and ready to use on PulsyAI.